Firstly, I apologise for the extremely long break in posts - one excuse is being busy with events and making kit, the other being just too lazy to update...
But I will update you all on everything I've made since last July.
Let's get down to business on my most recent make - a 1920s dress. For Christmas I received
Costume in Detail: Women's Dress 1730-1930. When I was flicking through it, I fell in love with one of the 1920s dresses. Now, due to my shape I tend to avoid the 1920s altogether, but it looked so simple to make as it gave measurements, and my Grandma had given me some old sheets to use for toiles - the striped ones being too good for such a purpose.
Looking at the design, the bodice of the dress is essentially a blouse worn back to front. I popped into my local supermarket and picked up a cheap blouse (a size bigger than I normally would have) costing me £4. When I got home, I cut off the collar, shortened the sleeves (going by the measurements in the book), shortened the length (going by the book), re-cut the neckline, and took out the darts. This fitted just how it should and I didn't have to make any complicated measurements or drawings.
I was then able to unpick the blouse so I would have my pattern pieces. I kept one sleeve, the pieces with the button holes on (I will cut off the buttons on the other piece before chucking it out!), and the back piece (now the front) which I cut in half so it can be cut on the fold.
I cut the pieces out of the fashion fabric, adding on an inch for the seam allowance, 1.5" to the hem, and an extra two inches for the centre back. I then reinforced the neckline by stitching along it 1/2" from the edge before sewing the side seams and shoulder. To neaten the seams, I folded each one over individually and stitched.
Next came the sleeves. Sew and neaten the side seam and then the cuff. For some reason the sleeve didn't fit in the armhole as neatly as it did on the blouse - there was more fabric - so I just added an inverted box pleat which did the trick and looks fine. The armhole seam allowance was trimmed to half and then zig zag stitched. For the centre backs, fold over an inch (right sides together) then fold over again. Stitch down at the top, trim seam allowance and then turn right side out. Iron the centre back flat down the length of the bodice.
For the neckline, I made a facing - a scrap of fabric with some iron on Vilene.The top edge matched the neckline of the bodice. The pieces were stitched right sides together, trimmed, and the curve clipped before being turned the right way and ironed flat. I then stitched the neckline to hold it in place, a few millimetres in from the edge should do it.
Then it was time for the piping, this was along the bottom edge. I have never sewn piping on a machine, so I did by hand and it didn't take too long either! I had allowed myself 1/2" for the channel. I marked this on the bodice (starting an inch up from the hem) and sewed the channel as I held the piping into place, adding extra stitched as the ends to stop it from sliding about.
Time for the two skirts. I followed the measurements in the book for these too. The longest measured 20" and the shortest at 14" (although mine is slightly shorter than that as I didn't want to waste fabric). As for the width, I used two widths of the sheet, but I would recommend anything from double the hem measurement on your bodice to allow for gathers.
I stitched the side seams, and neatened them, and then the hem. I then placed the two skirt together along the top and stitched them together 1/2" from the edge. To allow for ease when putting the dress on, I cut a slit 4" long in the centre of one of the halves of the skirt - this would be the centre back. I stay-stitched 1/4" from the edge and then bound it with some cotton tape. As for the gathers - the back half of the skirt is now essentially in two pieces. Gather each piece (from the side seam to the back) and pin to the bodice arranging the the gathers evenly and then stitch into place. Do the same for the front half of the skirt, gathering, and stitching it to the front half of the bodice. Once this is done, zig zag stitch the seam allowance and iron upwards into the bodice.
For the buttons, I used thirteen 1/2" self-cover buttons (according to the book), but ordinary buttons will also suffice if they match well. As for the button holes - the first measured 1" from the top edge and the rest from then on measured 1 1/4". This may be different for others depending on their size.
Next comes the belt loops. I used some leftover fabric/Vilene from the facing and cut two pieces 1" wide by 2" long. I ironed the long edges into the middle before folding the top and bottom edges and hand sewing them to the side seams, 2" from the piping. This is to hold a ribbon into place - anything from 1.5 - 2" wide.
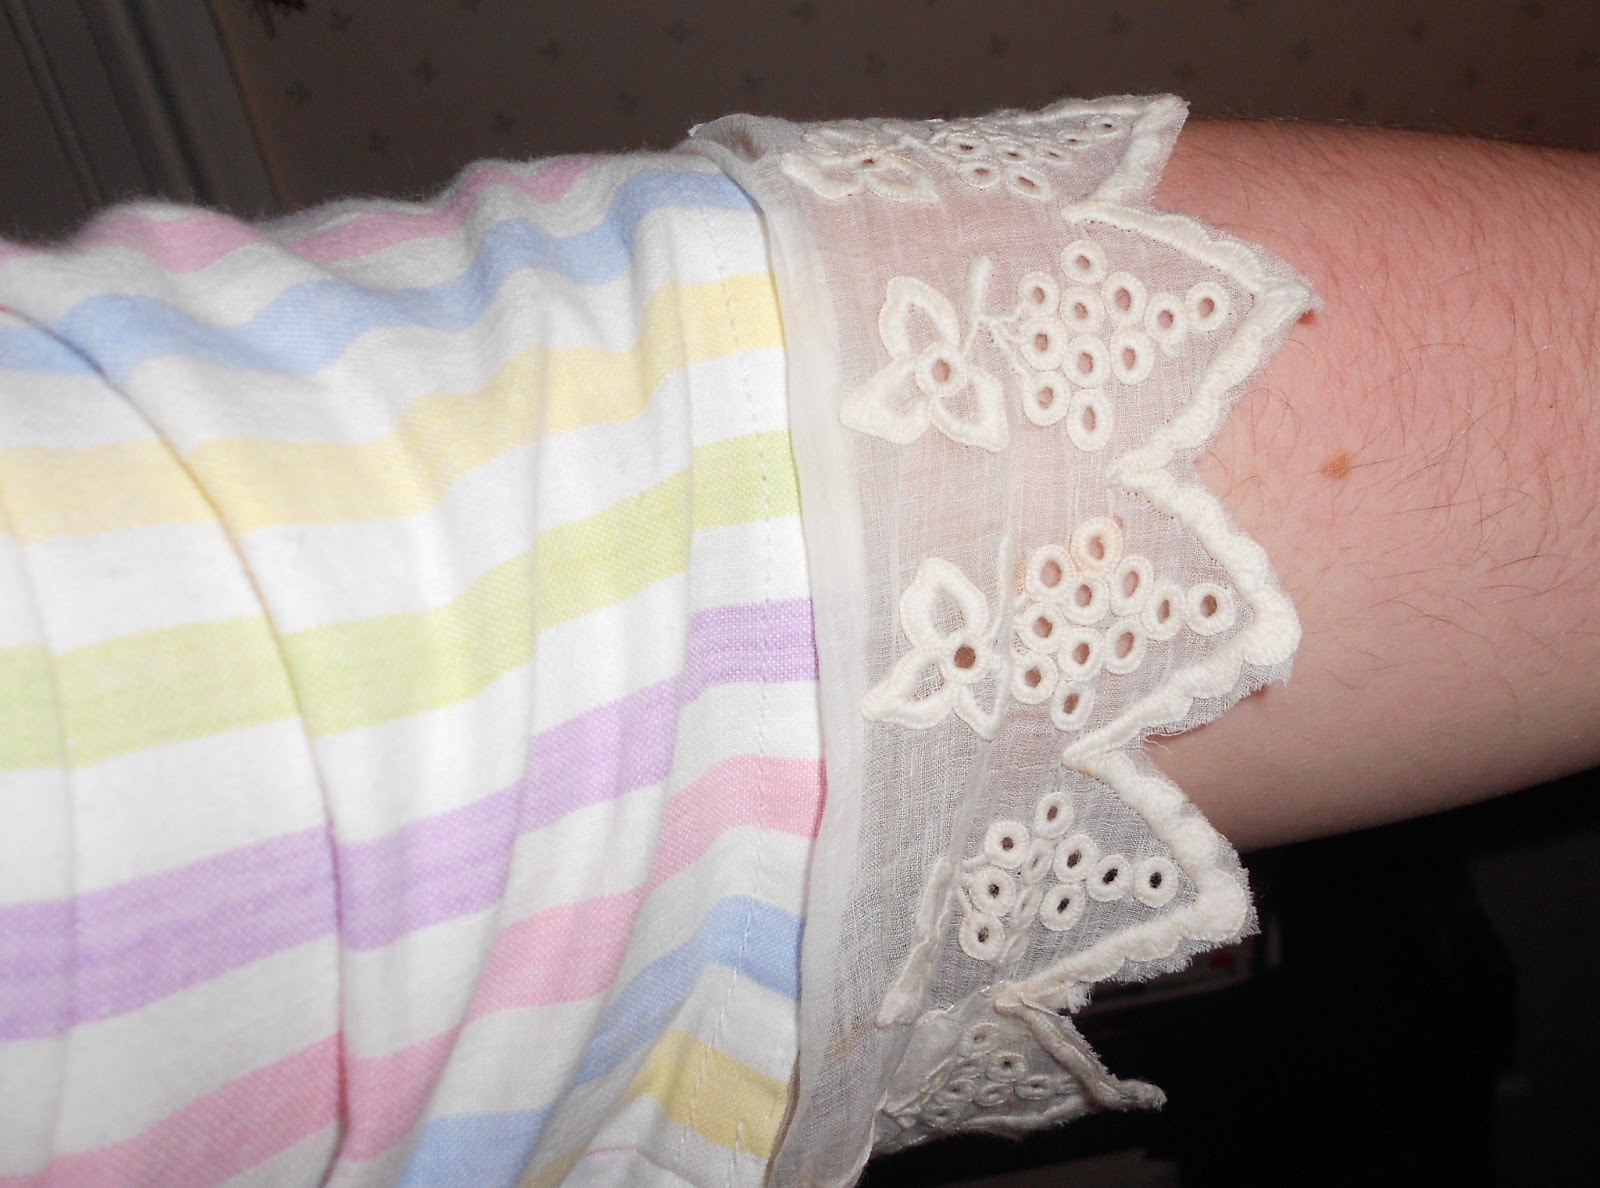
Lastly came the lace. The original dress has a 2" wide lace, fortunately I had some in my sewing box which pretty much matches the original. This was sewn around the collar and to the inside of the sleeves.